Show Mode
The new and improved show mode for running orders.
About This Article
The Running Order's show mode interface is designed to be intuitive, versatile, and visually appealing. This article will guide you through the improved running order and show mode.
Contents
The 5 Modes:
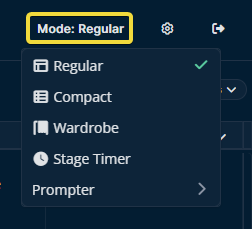
Easily toggle between the following five modes to suit your needs.
Selecting a Mode
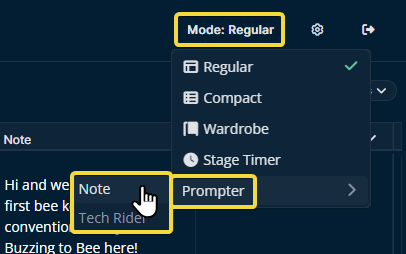
To change modes, click the Mode Selector in the upper right and choose the desired mode.
Regular Mode
Regular Mode offers a comprehensive view of the entire event timeline, including a mini-view of the stage timer and empowering features that help show callers seamlessly navigate the show.
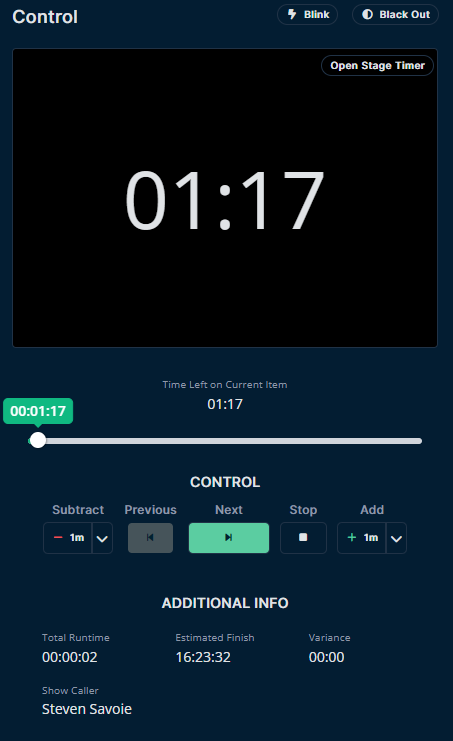
By default, Regular Mode is available to anyone who has been granted write permission in the event.
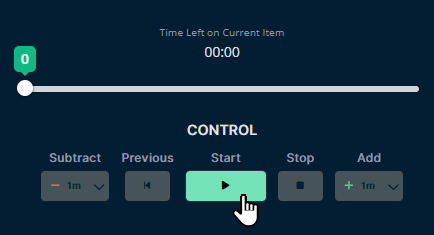
To start the running order, click play. This will instantly make you the show caller if one has not been previously designated.
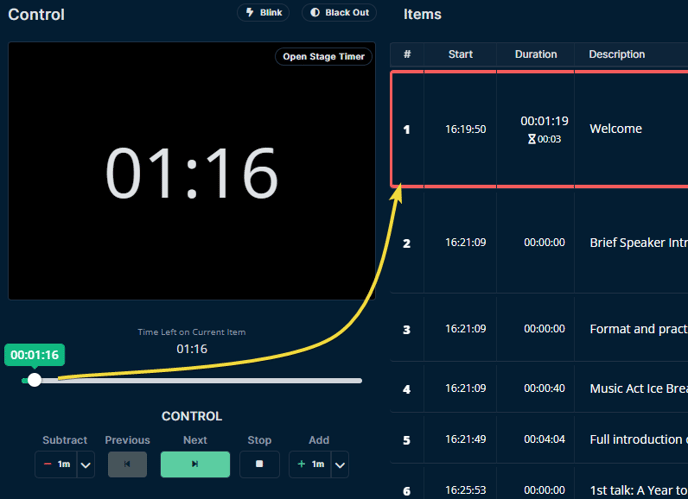
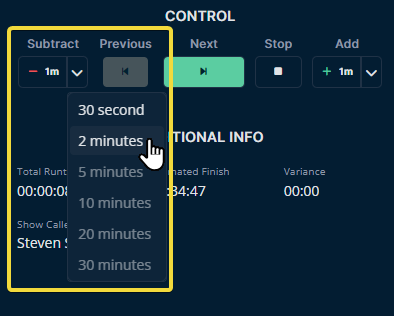
Once running, this handy slider lets you manually control the time remaining for the current row of the running order.
You can also use the controls beneath the slider to add or subtract time by specific increments. In this example, we are using the Subtract drop-down list to reduce the time remaining for the current row by 2 minutes.
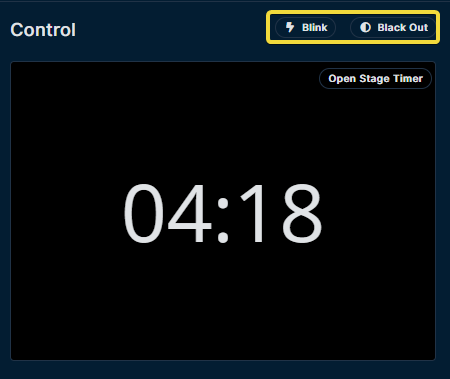
Above the mini timer display are 2 buttons that affect how the timer displays information. Blink will fade the displays in and out, while Black Out will display a blank screen.
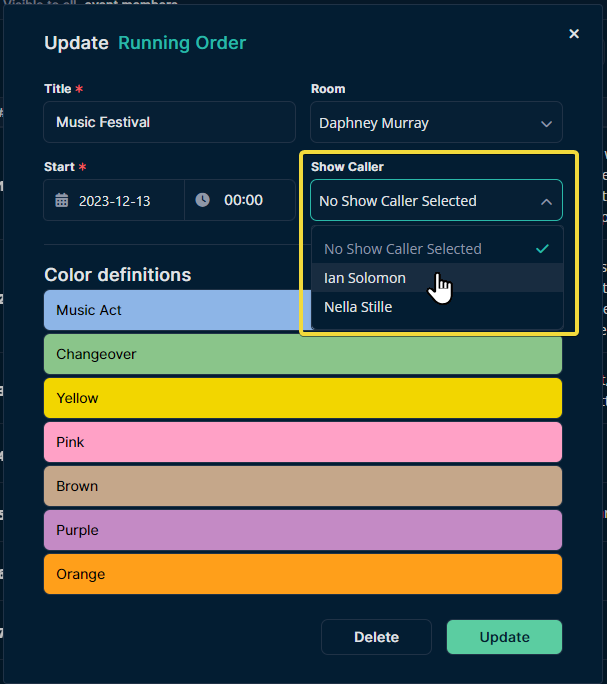
You may specify a member with write access as the designated Show Caller for this running order. To add a Show Caller, open the desired running order and click Edit.

Then simply select a member from the list of possible Show Callers. Only members invited to the event with Write privileges will appear in the list.
Designated Show Callers will retain access to Regular Mode. In contrast, anyone who isn’t the designated show caller will be offered Compact Mode but without the timing controls available to the Show Caller.
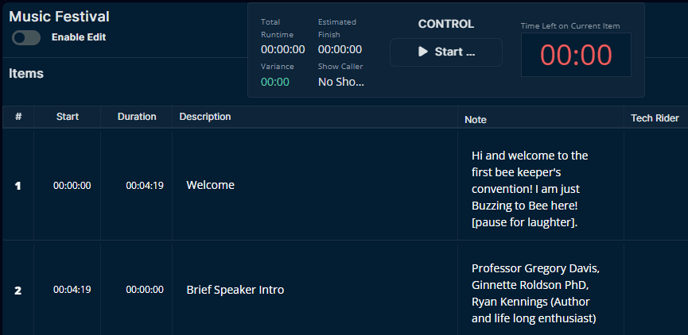
If someone else is the designated Show Caller, then the area at the top of the Compact Mode will look like this:

While Show Callers get this additional piece called Control.

Compact Mode
This mode provides a condensed overview of the event timeline, focusing on line items and show run details. It's ideal for other collaborators who need a quick snapshot of the event's structure.
This mode helps you focus on the line items and a few of the other important details.
Wardrobe Mode
Shows the viewer what’s currently happening and what’s on the way.
Stage Timer Mode
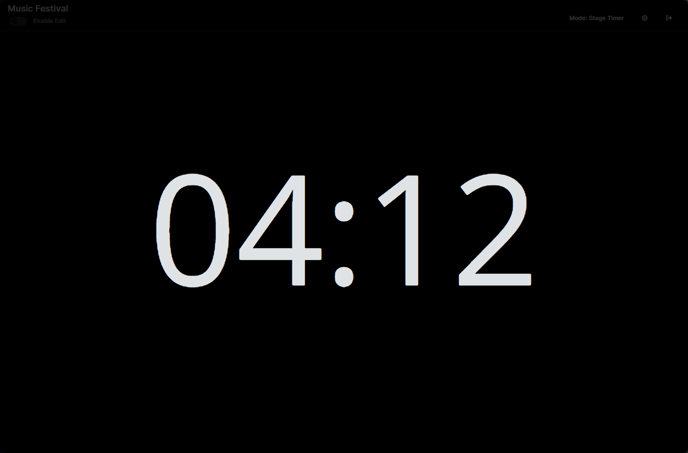
This mode displays the time remaining for the current segment.
Prompter Mode
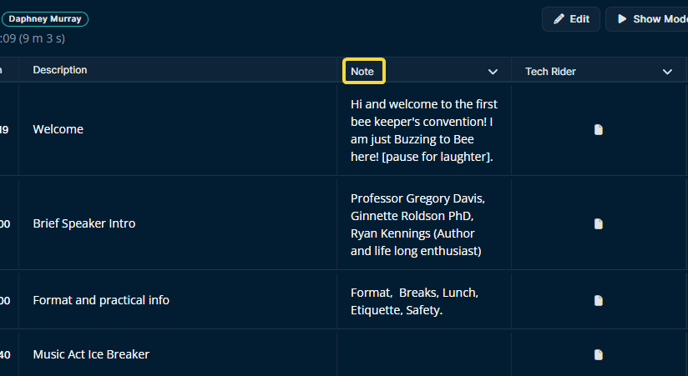
This mode is specifically designed for displaying prompts per segment to speakers or hosts, ensuring they're never caught off guard.

The displayed prompts are drawn from the columns added to the running order.
To start Prompter Mode, select Prompter, then the column you'd like to use as the prompter's text.
Row Triggers
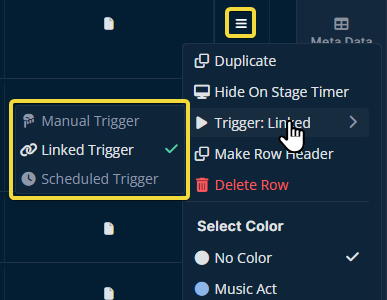
To further enhance your control over the event's flow, there are three trigger types.
Manual Trigger
Rows with Manual Triggers require the Show Caller to click Next to proceed to the next row.
Linked Trigger
When the current row's time elapses, the running order will be automatically advanced to the next row in sequence.
Scheduled Trigger
Rows featuring a Scheduled Trigger will always start at their designated time.
Setting a Trigger on a Row
This is done outside of Show Mode. Back in the event's Running Order tab, click the menu icon in the rightmost column of one of the rows and a list of all settings for that row will slide open. From here, you can change the row's trigger by selecting Trigger, then choosing the desired trigger type.
Setting the Show Mode's Default Trigger Style
You can configure show mode to always use a certain trigger type unless the current row has another trigger type assigned to it. To set this up, click the settings cog in the upper right of the Show Mode window, then select Trigger, then choose the trigger you'd prefer Crescat used for this Running Order.
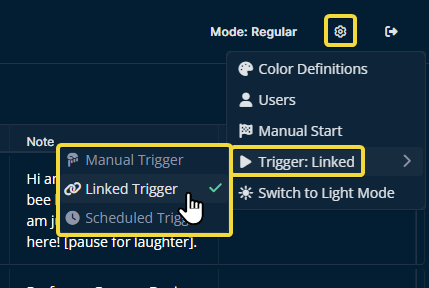
The Show Mode in the example above will always automatically advance to the next row once the row's duration has been completed. If a row has its own trigger applied to it, then the row's trigger will be prioritized.
Editing Rows While in Show Mode
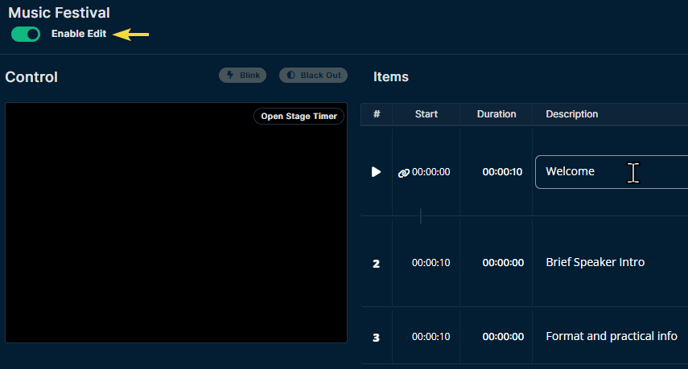
If you enable edit mode, you can edit the running order on the fly. If the running order is running, then some changes may only be made on future rows. For example, you cannot change the duration of current or previous rows.
Please let us know below if this article helped you get familiar with the running order's show mode.
All the best from Team Crescat!