💡Tip:
The best way to find out what Date, Start, etc. do is to set up a test email message. Write Date: {{$date}}, Start: {{$start}}, etc. and then fill out the form yourself and see what arrives in your inbox.
About This Article
This article will walk you through setting up automated Email Templates. You'll get a solid overview of the basics of email templating and a handy tip on how you can experiment your way through the different templating keywords (variables).
Contents
- Locating the Email Templates
- Creating a Template
- Anatomy of the Email Template Creation Menu
- Templating the Subject & Content
Locating the Email Templates
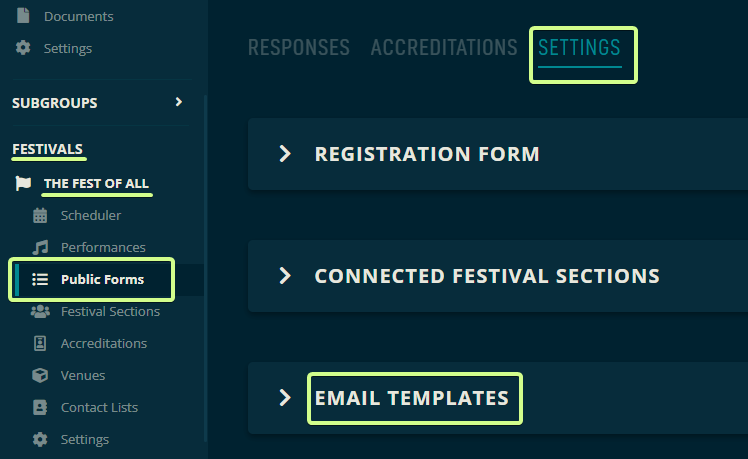
In the sidebar, click on Public Forms under the festival that you want to update. In the view that pops open, click Settings, then Email Templates.
Creating a Template
To get started, drop down the Email Templates menu item by clicking on it, then click Create New.

Anatomy of the Email Template Creation Menu
You will then get a menu for creating the email template. Let's go through all of the options one by one.
Type:
The type is the action that triggers the system to send out the email. You can set the email to be sent when
- the recipient submits the form.
- when a submission has been accepted or declined.
- Without Type lets you send the email manually instead.
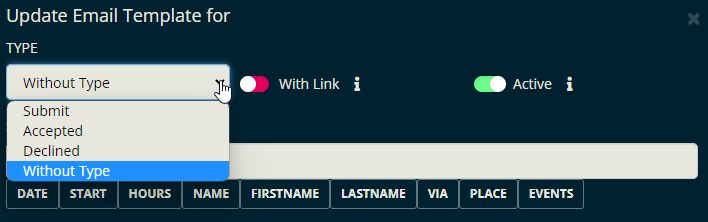
With Link
Includes the link to the recipient's submitted form so they can reference it and follow along.
Active
Switch this off when you don't want the email to be sent.
Subject
It will be the email's subject line. We'll cover all the little buttons further down the page.

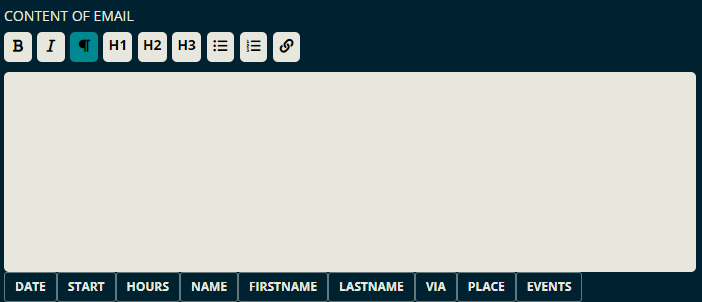
Content of the Email
This is the body of the email message.
Templating the Subject & Content
The easiest way to see how this works is just to click one of the buttons below the text fields.
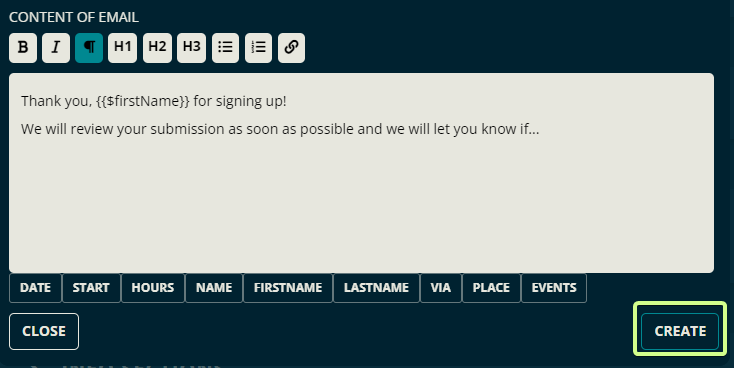
In the following example, Name was clicked. This added {{$name}} to our template. Whatever name the recipient used when they submitted the form will replace all occurrences of the text {{$name}} in this email.

Don't forget to add any desired punctuation like periods and exclamation points after the curly-braced text.
In the image below, there are many more buttons at the bottom of the text box. The exact buttons displayed here will vary depending on the connected content. However, the steps above work the same way for the rest of the buttons. When you're done, click Create.
💡Tip:
The best way to find out what Date, Start, etc. do is to set up a test email message. Write Date: {{$date}}, Start: {{$start}}, etc. and then fill out the form yourself and see what arrives in your inbox.
Let us know below if this article helped you understand Email Templates better.
All the best from us at team Crescat!