Configuring Notifications
Sure, notifications sound boring, but this should not be neglected if you really want to stay in the loop.
About This Article
This article will show you how to customize your notifications so that you are kept up to date with information that is important to you—and only when you need it.
As critical as it is to stay in the loop either by your browser, email, or mobile phone, you might not desire to know about every change for an event happening a few months away; so let's dial in some settings.
Contents
Finding the Notifications Settings
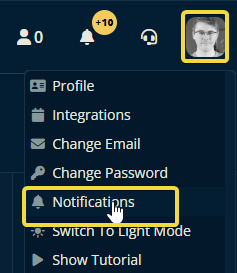
To get started, click your profile picture in the upper right and then click "Notifications".

Understanding Your Notification Settings
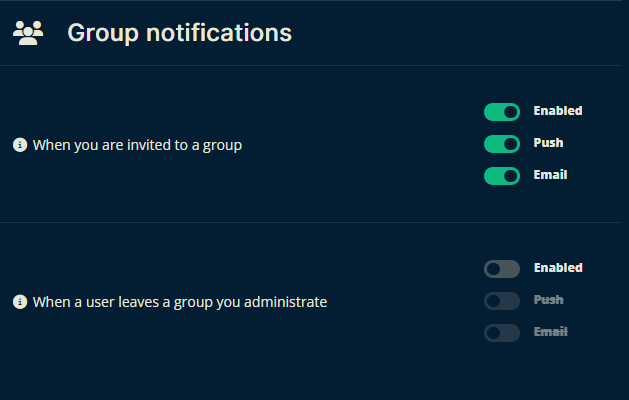
In the example below, the user will be notified by browser, mobile phone, and email every time they are invited to a group. On the other hand, if someone leaves a Crescat group that they are an administrator of, they will not be alerted by any means.

If you're unsure of what the result will be, you can get a quick summary by hovering your mouse over the info icon to the left of the description. In the example below, the summary given excludes push notifications and emails, as I have not selected these channels.

However, if I toggle 'email' on, the summary gets updated, and I will now receive notifications on all channels when I am assigned a shift.

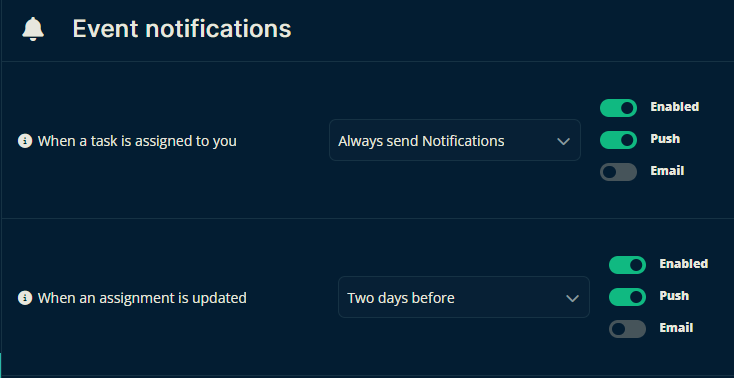
Finally, there are some notifications that have a drop-down box with timeframes. Select the timeframe that matches your preferences.

In the image above, Whenever you're assigned a task, it will always send you a notification via the channels you've enabled on the right side.
The second item in the list, "When an assignment is updated" would, only sends you notifications to the selected channels two days prior to the event.
Adjusting Your Alerts
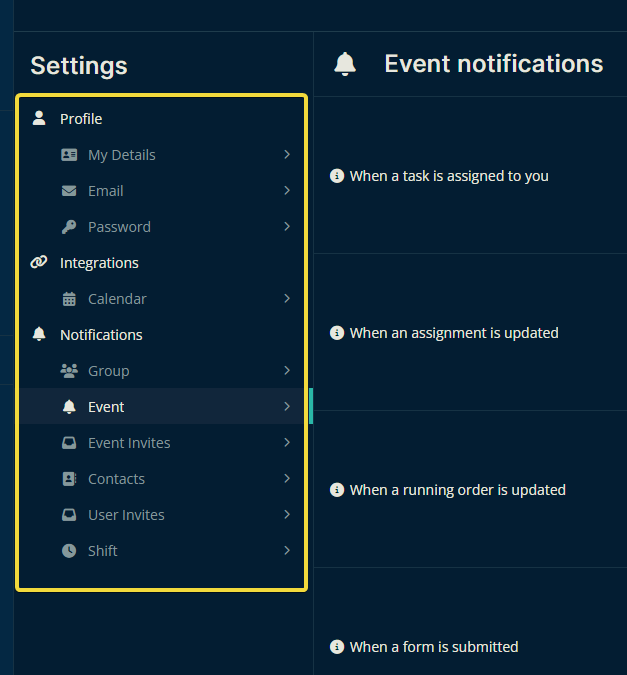
All that is left now is to work your way through the menu items on the left and set your preferences in each category.

Please let us know below if this article helped you understand how to update your notifications settings.
All the best from us at Team Crescat!